How Fabric Care Symbols Affect Your Custom Patches (What Every Buyer Should Know Before Ironing or Sewing)

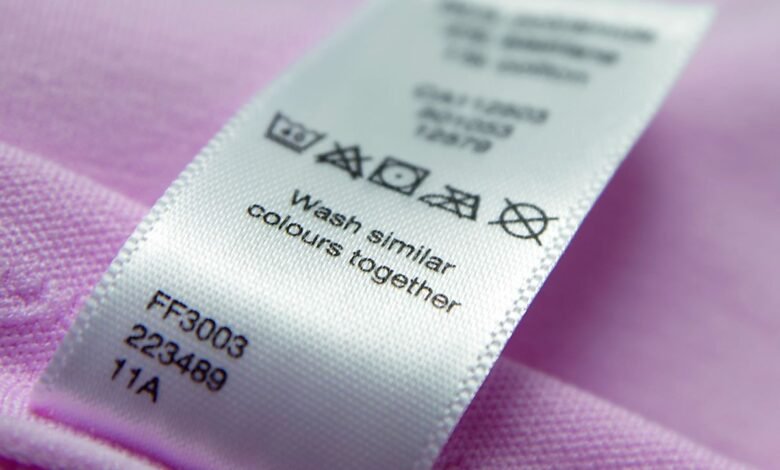
If you’ve ever ordered a custom patch for a jacket, hat, or uniform, you’ve probably focused on the design first — colors, thread type, border style — and left the fabric itself as an afterthought. But the little symbols on your garment’s care label actually have a lot to say about how (and whether) a patch should be attached at all.
Understanding fabric care symbols isn’t just about laundry day. It’s also the difference between a patch that stays sharp for years and one that peels, scorches, or warps the fabric underneath it. Here’s what to check before your next patch goes on.
Why Care Symbols Matter Before You Attach a Patch
Every care label communicates temperature limits for washing, drying, and ironing. Those same limits apply the moment you introduce an iron-on patch, since heat-activated adhesive backing needs direct contact with a hot iron to bond properly. If a garment’s care label shows a low ironing temperature or a “do not iron” symbol, that fabric is telling you it can’t handle the heat an iron-on patch requires — melting, scorching, or glazing the material is a real risk on synthetics like nylon, polyester blends, and some technical outerwear.
This is why patch type matters as much as patch design. A garment rated only for low-heat care is usually a better candidate for a sew-on patch or a Velcro-backed patch, both of which skip the heat step entirely.
Matching Patch Application Methods to Fabric Symbols
A quick way to decide between iron-on, sew-on, or Velcro patches is to read the ironing and drying symbols on the garment tag:
- Iron symbol with three dots (high heat): Cotton, canvas, and heavy twill can usually handle iron-on application safely.
- Iron symbol with one dot (low heat) or a crossed-out iron: Skip iron-on adhesive. Sew-on application protects delicate or heat-sensitive fabric.
- Do not tumble dry symbol: Garments with this label are often more delicate overall, so a lighter-weight patch and hand application is the safer route.
- Dry clean only symbol: Iron-on adhesive can interfere with dry cleaning solvents over time, so sew-on or Velcro is generally the better long-term choice.
Reading these symbols before ordering also helps you choose the right patch material in the first place — leather and PVC patches, for instance, are more forgiving on rugged outerwear, while embroidered patches sit well on cotton and twill that can tolerate standard ironing heat.
Designing a Patch That Matches Your Garment
Once you know which application method fits your fabric, the next step is nailing down the design itself. This is where a lot of first-time patch buyers get stuck — sketching ideas, second-guessing colors, or not knowing how a concept will actually look stitched or printed.
A Free Ai patch generator can shortcut that process. Instead of starting from a blank page, you describe the theme, shape, and colors you’re picturing, and the tool generates a visual concept you can refine before sending it off for production. It’s a useful way to test ideas quickly, especially if you’re ordering patches for a team, club, or brand and want everyone to see a mockup before committing to a final order.
Caring for Garments After a Patch Is Applied
Once a patch is attached, the original care label instructions still apply — with a few extra precautions:
- Turn garments inside out before washing to reduce direct friction on embroidered or printed patch surfaces.
- Avoid high-heat drying even if the garment’s tag allows it, since repeated heat cycles can loosen adhesive backing over time.
- Iron around the patch, not over it, unless the patch itself is heat-safe — check with the patch maker if you’re unsure.
- Spot clean PVC or rubber patches rather than machine washing when possible, since these materials can crack under prolonged agitation.
Building Something Custom That Lasts
The real goal is a patch that looks as good after twenty washes as it did on day one, and that starts with reading the fabric care label as carefully as you’d read a patch proof. Whether you’re outfitting a motorcycle club, a scout troop, a sports team, or your own jacket collection, matching the patch material and application method to what the garment’s care symbols actually allow will save you from redoing the work later.
If you’re ready to bring a design to life, browsing Custom patch options is a good next step — from embroidered and woven to leather and PVC, choosing the right material from the start makes the fabric care conversation a lot easier down the road.